Vape Cleaning: A Practical Guide to Cleaning Your Vape

Today, a wide range of electronic vaporizers, commonly called vapes, are available in the market. These include slim and stylish vape pens, heavier vape mods, sturdy pod mods, and tanks. While these devices serve the common purpose of vaporizing e-juice for users to inhale, they require regular cleaning and maintenance. Unfortunately, many users don't focus on vape cleaning.
Despite their seemingly sophisticated and self-regulating nature, these devices' tiny parts require individual attention to function optimally. Therefore, in this comprehensive guide, we will highlight best practices on how to clean a vape pen to function smoothly.
Why Is Vape Cleaning Essential?
Vape cleaning is essential for two primary reasons: longevity and hygiene.
Firstly, it's easy to understand that an object you put in your mouth multiple times a day can quickly become a breeding ground for harmful germs. Regularly cleaning all components prevents the transmission of microorganisms.
Secondly, cleaning your vape device can prolong its lifespan. If you allow the battery, screens, coils, and cartridges to accumulate residue from previous uses, they will deteriorate faster. By cleaning the components, you can save both time and money.
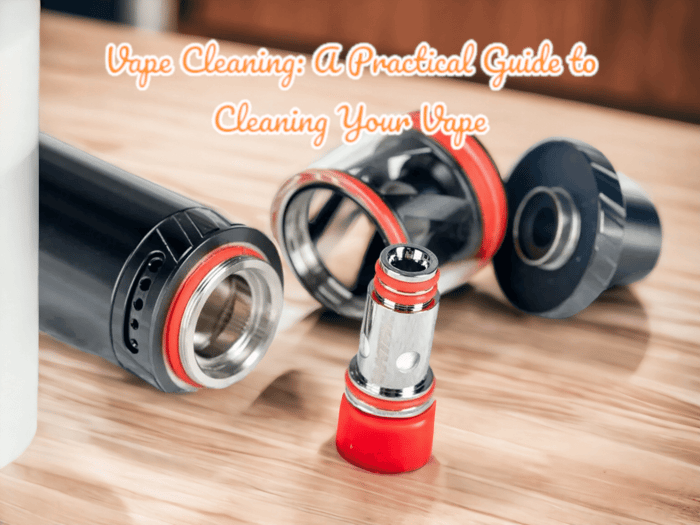
How To Clean Your Vape Tank?
Vaping devices require proper maintenance to function effectively and maintain hygiene. Cleaning the tank is one of the significant parts of the maintenance routine. Here's a step-by-step guide on how to clean a vape tank.
Empty Vape Tank
Before you start cleaning the vape tank, disassemble the vape and empty the tank of any e-juice. It's important to time this step properly. The best time to clean vape is after using a fresh juice pod. Please do not attempt to clean the tank while there's still much juice.
Take the Vape Coil Out
Once you have emptied the tank, remove the coil from it. Place the coil aside but keep it within reach. You can disassemble the entire vape and remove the tank, coil, and battery if you prefer. Taking your device apart may seem overwhelming, but it's crucial for a thorough vape cleaning job.
Pro-tip: Take pictures along the way. It can be challenging to put a vape back together without visual aids.
Rinse the Tank With Warm Water
It's important to avoid using extremely hot or cold water, as it can damage the tank's interior. Use warm water to rinse out the tank thoroughly to remove accumulated gunk.
Soak The Tank
Soak the vape tank in a bowl of warm water for a deeper clean. Add a mild cleaning solution from a vape cleaning kit, such as dish soap, vinegar, or baking soda, to the water for added cleaning power. Cleaning the vape tank with alcohol is also recommended. Add any other removable parts to the bowl, such as the mouthpiece, O-rings, or drip tip. Keep your vape battery and coil away from the water.
Scrub the Tank
To ensure a thorough clean, scrub the tank gently with a non-abrasive sponge or brush. Although this step is optional, it removes stubborn residue.
Dry The Tank
There’s no need to complicate this step — just set the tank aside and let the air do the job.
How To Clean Your Vape Coil?
Vaping enthusiasts know cleaning vape coils is crucial to ensure the best possible experience. If you want the vape to perform optimally, take care of the coils. Here's how to clean your vape coil in four simple steps.
Soak The Vape Coil
Before cleaning the coil, you need to remove it from the device. Put the coil in a container with a cleaning agent. You can use household cleaning solutions like vinegar or ethanol or buy specific coil cleaning products. Whatever cleaning agent you use, let the coil soak for at least an hour to break down the gunk buildup.
Thoroughly Rinse The Coil
After the coil has soaked in the cleaning agent, it's time to rinse off the grime. Hold the coil under running water and scrub off any remaining dirt with a toothbrush. Be gentle but thorough in your scrubbing to avoid damaging the coil. Keep rinsing until the coil looks clean and shiny.
Clean The Wicking Holes
Many people overlook this step, but cleaning the wicking holes is essential. The wick is the component that soaks up the e-juice, which the coil heats into vapor. Over time, the wicking holes can get clogged with gunk, affecting the quality of the vapor. Take a toothbrush and scrub the wicking holes, removing any buildup.
Let Stand To Dry Fully
Once you have rinsed and scrubbed the coil and wicking holes, it's time to let it dry. You can pat it down with a towel or blow on the coil. Make sure to let it stand for several hours to dry completely. Once it's dry, you can reinstall the coil in your vape device.
How To Clean Your Vape Battery?
The last part you need to focus on is cleaning the vape battery, as it's essential to take care of. Let's have a step-by-step guide to cleaning your vape battery.
Clean Your Hands
To clean vape batteries, ensure your hands are clean and free from water residue. Remember that batteries can be easily damaged if they come into contact with the wrong substance, so keeping your hands clean is crucial.
Remove The Battery Carefully
Gently remove the battery from your vape, handling it with care. A compromised battery can sometimes short-circuit a vape, so proceeding with caution is essential.
Clean The Battery's Connection Areas
Take a cotton swab and rubbing alcohol and lightly dab the areas where the battery connects to the tank and atomizer. This will help break down any juice buildup that may have accumulated and prevent it from interfering with the battery's placement.
Remember The Air Holes For Vape Cleaning
It is crucial to clean the air holes in your vape pen after cleaning the connection areas. Neglecting to clean them can result in a buildup of residue that can impede airflow, causing a suboptimal vaping experience.
To ensure your device functions correctly, you should use something small and pin-like, such as a toothpick or thumbtack, to remove any buildup from the air holes.
Wipe Down The Outside Of The Battery With Rubbing Alcohol
Take a small amount of rubbing alcohol to thoroughly clean the battery's surface, and wait until it is entirely dry before reinserting it into the vape pen.
Why Shouldn't You Clean Vape Pods In Vape Cleaning?
Vape pods are a vital element of any vaping device as they contain the vaporized e-liquid to create the inhaled vapor. However, vape pods are not designed to last indefinitely like your vape device's tank, battery, and coil. Over time, residue from the e-liquid builds up inside the pod, leading to reduced vapor production.
While it is possible to clean vape pods but avoid overdoing it, cleaning can remove some of the residues, but it can also cause damage to the pod. Vape pods are made of delicate materials, and excessive cleaning can lead to leaks or damage to the wick or heating element inside the pod.
How Often Is Vape Cleaning Important?
The frequency at which you clean your vape device depends on your usage. Occasional cleaning or once a month is enough for medium smokers. Heavy smokers should clean vape pens regularly due to the accumulation of dirt from frequent use. Experienced and heavy vapers should clean their vape device at least once weekly. Vape Cleaning regularly avoids a loss of flavor and reduces cloud production.

Conclusion
It is important not to view your vape device as disposable. Despite its small size, it is a highly sophisticated piece of engineering that can perform the complex task of vaporizing e-juice. As such, it deserves to be treated with respect and cleanliness. Vape cleaning regularly will extend its lifespan and enhance your overall vaping experience. So, prioritize the cleanliness of your vape device for maximum enjoyment and longevity.